Mokume Gane Pendant

Mokume Gane Pendant
Julie Picarello Style

Sunday, May 12, 2013

It's A First!

My First-Ever Craft Fair

Sunny Days in Gay Craft Fair

May 5 and 6, 2013


The front of my booth.

I finally put my first booth in a craft fair!  It took a lot of nudging by some co-workers, but I'm so glad they did!  Saturday was horrendous!  It was raining sideways!  And cold!!  The temperature never broke 50°!  I had the finest shade of purple lips when the day was over!
Sunday, the sky cleared and temperatures rose to the low 60s! 
What a fantastic day!


This is the side of my booth.  I was so fortunate to get a space up-front and on a corner my first show!  The shows (The Cotton Pickin' Fair is across the street) boast 300,000 people through the shows each year.  The fairs are held the first full weekend in May and October each year.
 
 
This is the jewelry area.  My son made the necklace displays.  One is a wine bottle and the other is a very old shampoo bottle he found under the house they bought.  My daughter-in-law wanted that one back --- and I don't blame her!!  The earring display was found at Hobby Lobby.  It started out hot pink, so I painted it the colors I used in my booth.
  

These two shelves were bought at Family Dollar for $12.00 each.  I painted them green, too.  They are displaying my salt and pepper shakers, pens and covered tins.
 
The one on the left was the Saturday set-up.  The one on the right was during the torrential downpours! My son changed things around a little when the sun finally shone!
 
This corner étagère was also purchased at Hobby Lobby.  I had most of my jars and vases on it, along with my margarita glasses that I loved.  Surprisingly, nobody purchased them!  
 
My son also moved it around the second day.  It was on the back corner and he moved it to the front.  We weren't able to put the green liners back on the shelves because they refused to dry!


These are votive candle holders using translucent clay to allow the light to show through.
I ended up setting up a small display to show how I made the polymer clay.  People thought they were painted on until they touched the pieces.  So I set up and showed them and left them feel the raw clays and see some canes.
That was fun!
 

Last but not least, the table that was the major topic of questions --- not for the ornaments and jars, but the bistro set itself!!  It was loved!  The set came from the Home Depot for $139.00.  And that's the original color!
 
It was a fantastic experience and I was told that I was I started out about as bad as it could get with the Saturday storms!  I'm still trying to decide if I'm going to do the show in October.  But, I need to find a place to put all of the extra stuff I had to buy for display first!
 
Happy crafting! 
 

Sunday, January 20, 2013

Color for Up ‘n Smoke or…how to paint a checkerboard!

Remember the bland piggy?
There were actually 2 or 3 more attempts.  Didn't like any of them.  Just couldn't cook anything up that had any interest.....

So, I stripped off all of the paint, yet again!! 
 
Leading me to color in the form of a checkerboard.  I had a difficult time finding an easy tutorial for painting a checkerboard, so I combined a few to create my own fairly easy way.
I don’t have pictures of the first few steps because I didn’t know I would decide to make a mini-tutorial.
After deciding the area you want to be your checkerboard, tape it off. 
The entire area of your checkerboard should be painted in your lightest color.  In my case, white.  After that is totally dry you can start taping out your pattern.
Decide how large you want your squares, based on the thickness of available tape.  Personally, I prefer Frog Tape.

How Frog Tape Works
It is available in several widths
1”, 1 1/2” and 2” at most home supply stores. I used 1” in my project.
Tape off  your first line using small pieces of your tape at both ends of your checkerboard to get a precise width on your line.

I don’t have actual pictures of this step, so I apologize for this mock-up on my work table!!


Now, move the scraps of tape (or tear new ones) and place for your second and successive rows.

After you have done the process, repeat it on the perpendicular, creating squares. 

After making sure you remove all  scrap pieces of tape, paint your entire area with the second color.  In my case, red.


When the paint dries, remove all the interior tape and repeat the process covering the  red squares in both directions. 

Paint the red again, and let it dry completely. 

Remove the tape again and
almost-instant checkerboard!


I will post a picture of the completed piggy sign as soon as I finally paint “Up ‘n Smoke”!


Well, here it is... 
The rusty pig that nearly broke me!!  Hope he likes it!!


Up ‘n Smoke

One of my co-workers has a competition BBQ team.  He brought this chemically-rusted metal pig to me and asked me to paint "Up 'n Smoke", their team name, on it.

 
Piece of cake, right?  Well, no.


10-oz. Vintage Gold Satin Metallic Paint
My first attempt was using Martha Stewart Metallic Paint.
I don't have any pictures of that.  To this point I hadn't realized what a trial this project was going to be!  It has to be the most expensive 'freebie'


I've ever done!
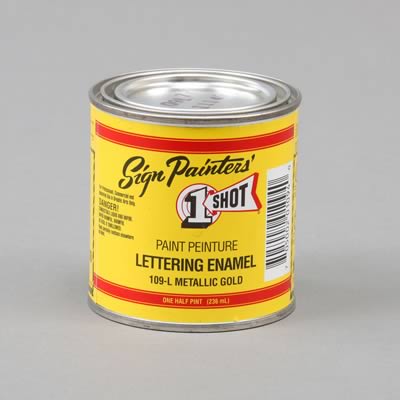
 osl-109-l_w.jpg1 Shot Lettering Enamels
The second try, I used 1Shot gold automotive paint that I purchased at Summit Racing Equipment in McDonough, GA..
 
As you can see below, it seemed too "bland" --- and nobody likes a bland pig!  So, I decided to outline it in red. 
Not so hot! 
I had tried to curl the lettering some to conjure the illusion of smoke.
My piggy plan was actually going up in smoke!
~*~
So, out came the paint stripper!!
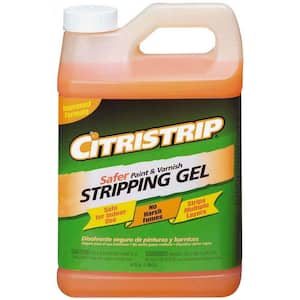
 I used Citristrip Stripping Gel from The Home Depot.
Let me tell you, this stuff is FANTASTIC!!

 
No fumes or odor, and it curdled that paint right up!

There were actually 2 or 3 more attempts.  Didn't like any of them.  Just couldn't cook anything up that had any interest.....
Then I decided it needed COLOR…
and another post …..